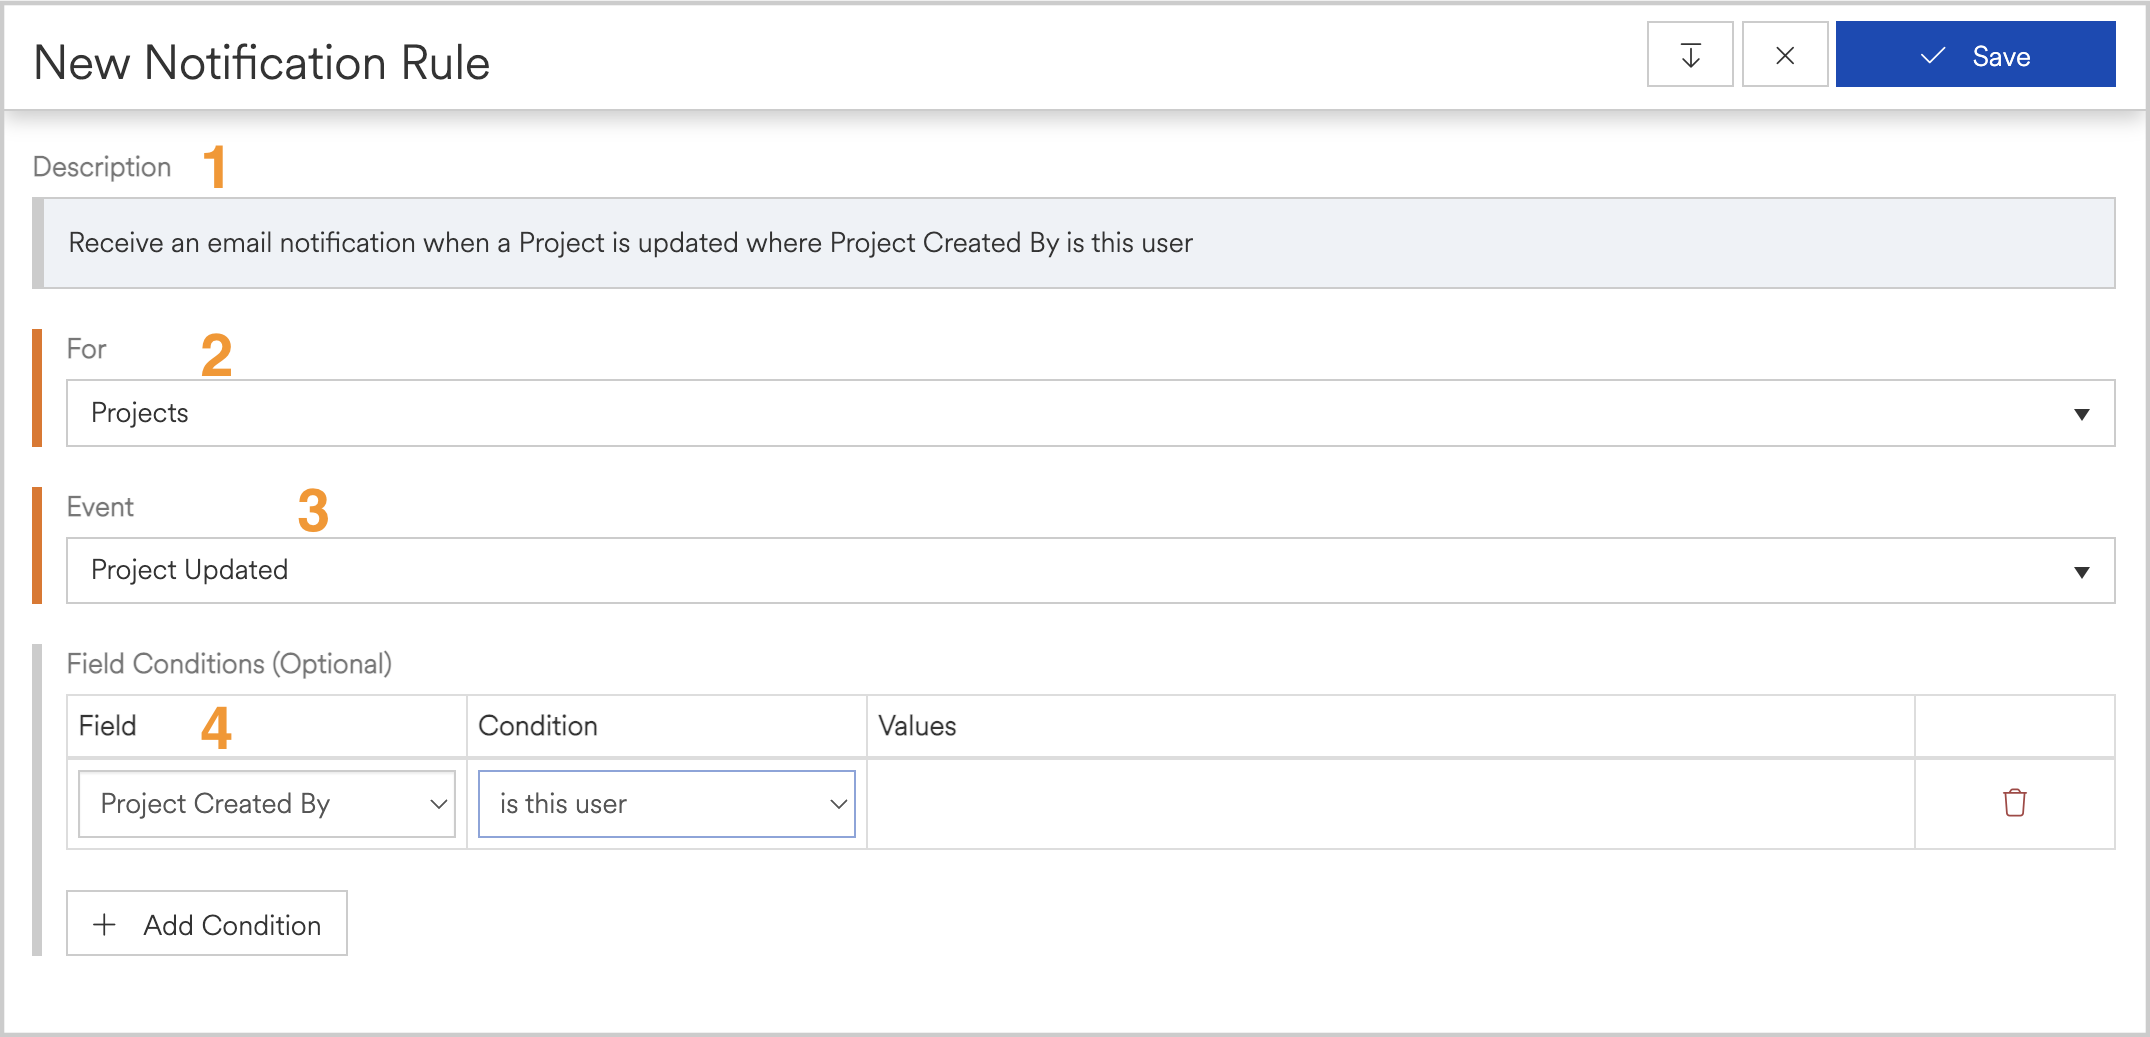
For the Notification Management System to send a notification to a given user, each notification rule being evaluated must satisfy all of the conditions of the rule. The three major conditions of a rule include the Object (such as “Tasks”, or “Projects”), the Event (such as “Created” or “Updated”), and the optional Field Conditions (such as the “Project Owner” or “Task Assigned To” fields).
Objects and Events drive the “what” in the notification rule: What is it that we want to receive notifications about? Field Conditions allow for fine tuning based on selected fields, the condition for that field, and a set of appropriate values if applicable.

- The description of the Notification Rule is dynamically generated based on the Object, Event, and Field Conditions defined.
- The “For” drop down list presents the available Objects that the notification system offers (currently “Projects”, “Task Comments”, and “Tasks”). Objects dictate what type of Events are available in the next step.
- The “Event” drop down list presents the available Events that the selected Object has to offer. For example, if “Projects” is the selected Object, the events available would be “Project Created” or “Project Updated”. A user would select the type of event that they would like the rule to run against. If, for instance, a user would like to receive an email notification any time a project is created, a rule should be created that selects “Projects” as the Object, and “Project Created” as the Event and not define any further Field Conditions.
- The “Field Conditions” list is a list of Fields based on the selected Event. Each Event has their own list of available Fields appropriate for the Selected Event (and in turn, the Selected Object). The second column, “Condition” is a list of appropriate conditions based on the selected Field. The third column, “Values” allows a user to pick specific values based on the selected Field and Condition. Note that not all Conditions allow values to be chosen if the Condition itself does not require Value selection (see section Objects, Events, and Field Conditions for further detail). For example, in the screenshot above, “Project Created By” is the chosen field and “is this user” is the chosen Condition. Because the Condition does not require Value selection, the “Values” column does not show any options. However, in the screenshot below, the Condition was changed to “is any of” and that shows that the Values column to allow the user to select from a list of Users as the values to satisfy the condition. The fourth column provides actions available for the Field Condition: Delete the condition, or change the position of the Field Condition within the Field Conditions list. Note that ALL Field Conditions must pass in order to satisfy the notification rule, and thus the Field Conditions list should be thought of as a binary AND list.
When values are selected using the Select… link, the contents of the Values cell change to show the selected items and a series of action buttons underneath the values to further manipulate the values.
- The first three values will be displayed and than an appended “and n more” to help save screen real estate. The Eye button will reveal all of the values.
- The second button (‘change’ icon), will allow a user to replace values with completely new values.
- The third button (‘plus’ icon), will allow a user to add additional values. Duplicative values will be ignored.
- The fourth button (‘minus’ icon), will allow a user to remove values from the list.