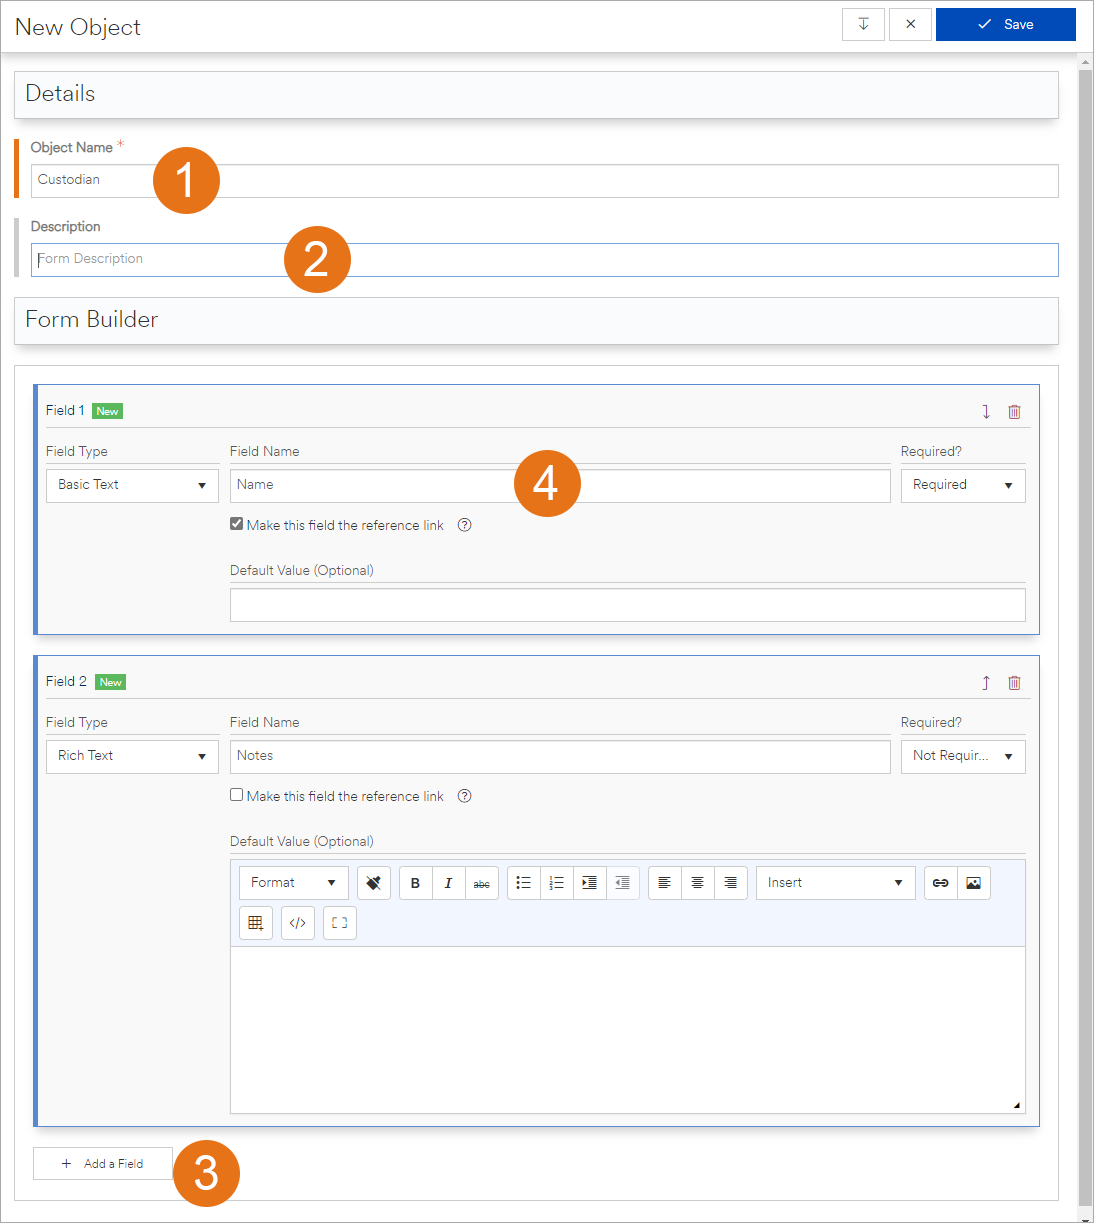
To create a custom object, navigate to the objects list page by clicking on the gear icon at the top right and selecting the Objects item.
Click on the New Object button to begin.

- Object Name (required). It is recommended that you keep the name short and singular, such as "Custodian" instead of "Custodians."
- Description (optional). This information appears in the objects list.
- Add a Field button. An object requires at least one field. Add as many as you need.
- Field card. Similar to forms, you can select from a variety of field types that can accommodate many different input scenarios. Fields can be made required or not.
One field must be marked as the Reference Link field using the checkbox input below the field name. The information entered into this field when creating instances of the object will be what's displayed when the object is referenced. It will also be the field that is clickable within the object's list page in order to view the object. Although any field type can be used as a reference link field, we recommend that you use a basic text field, so that the object is easily identifiable when referenced and that the field is marked as "Required."
Once the object is saved, it will appear in the objects list. The object can be edited or deleted by clicking on the corresponding record's context menu (3 vertical bars on the far left of each record).
If this is the first custom object created in your workspace, a new menu icon will show up on the navigation bar right after the Tasks tab. Click on this icon, and you will see your custom object's list item. This menu is where all of the custom objects defined in the workspace will appear.

Clicking on the list item will bring you to that custom object's list page where you can view and manage instances of the object.