Portal Landing Page
Users with access to the portal may navigate to the request portal landing page to log in. If a user needs access, an organization administrator must first grant them access (see the help article on portal user management for more information). The request portal landing page address will be different depending on your Agility Blue subscription type and region:
Pro Subscriptions
The United States pro subscription portal is located at https://portal.agilityblue.com/v2/login. If you are located in a region outside of the United States, the address format will be https://agilityblue.com/[REGION]/portal/v2/login where [REGION] is the 2-letter country code you use to access Agility Blue (for example, Canada's request portal address would be located at https://agilityblue.com/ca/portal/v2/login and the United Kingdom's request portal address would be located at https://agilityblue.com/uk/portal/v2/login.
Enterprise Subscriptions
For enterprise subscriptions, the request portal uses the address format https://[ORGANIZATION SUBDOMAIN]/portal/v2/login where [ORGANIZATION SUBDOMAIN] is the subdomain used for your organization (for example, the fictional organization "ABC Company" would be located at https://abc.agilityblue.com/portal/v2/login).
If you need assistance with locating your portal landing page, please contact support at support@sadiebluesoftware.com.
Logging In
Once at the portal landing page, you will be presented with the available login methods:
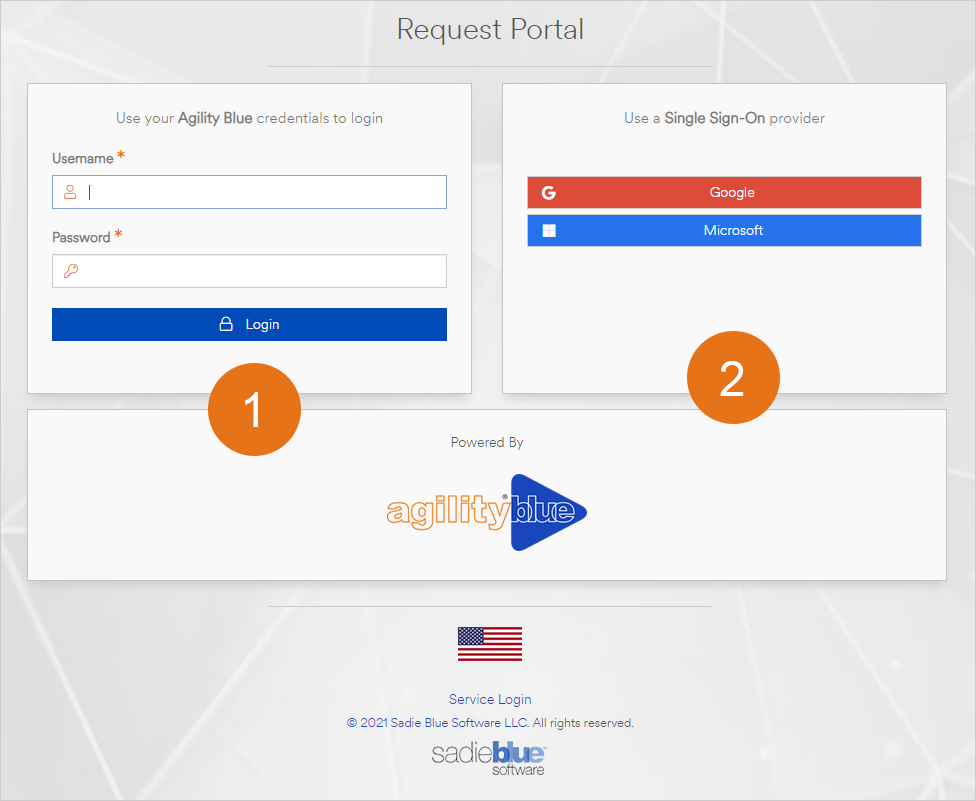
- Use this method if you have an Agility Blue user account.
- Use this method if you have an externally-linked single-sign on account.
The Workspace
If you have access to more than one workspace, you will first be presented with a list of workspaces. Select the desired workspace by clicking on the name link to enter. If you only have access to one workspace, you will be placed directly within it.
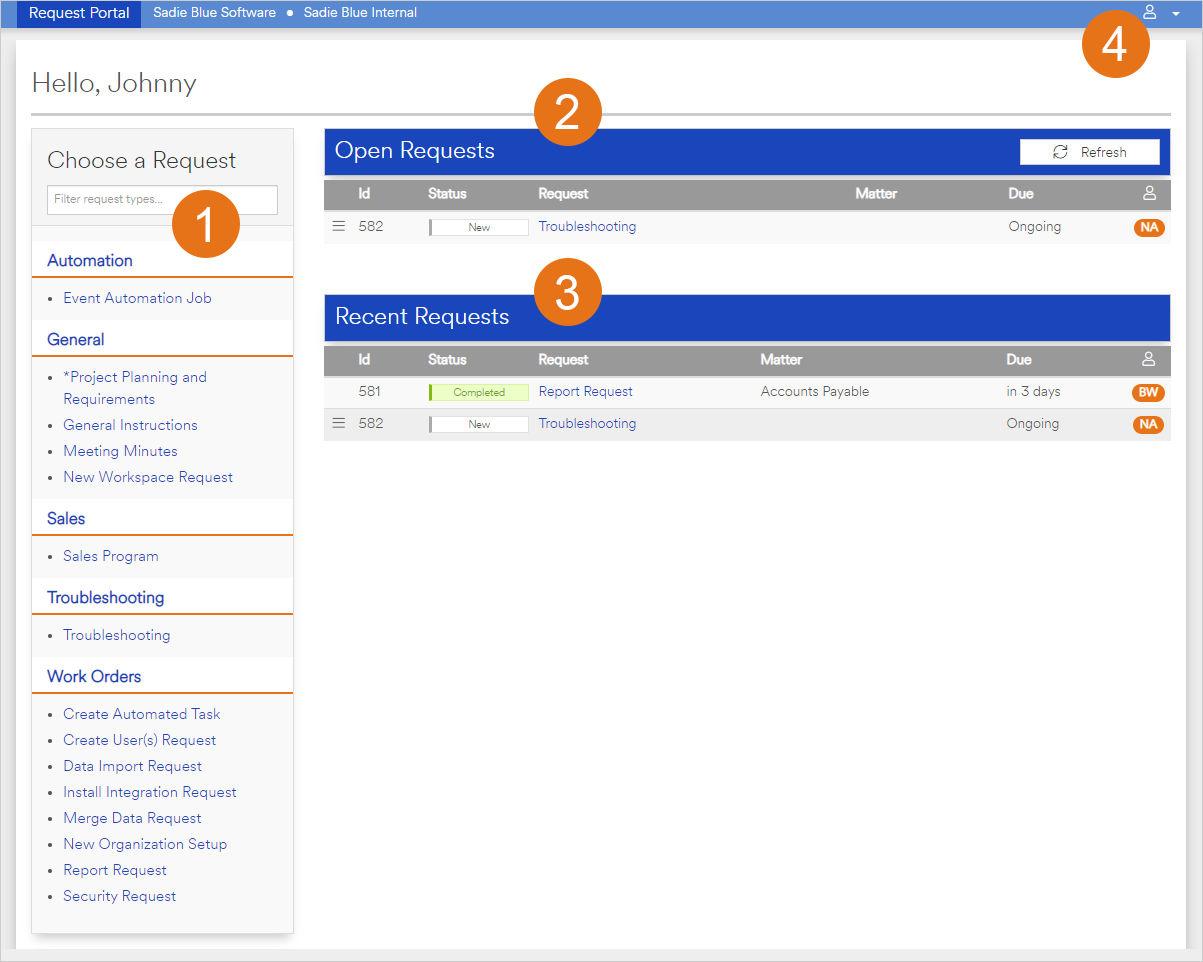
- The Available Requests List. Portal requests are synonymous with the forms defined in the workspace that have the "Available on the Portal?" option flipped on. You start a request by selecting one of the links.
- The Open Requests List. This table shows a list of requests that were created by the logged in user that have not yet been completed.
- The Recent Requests List. This table shows a list of requests that were updated within the last 30 days. Request details can be viewed by clicking on their name, or by clicking on the context menu on the far left of each request (the icon with the 3 stacked bars). The context menu also allows you to edit the request or cancel it.
- The Options Menu. This menu allows the user to visit their profile, view their workspaces, email our support, or log out of the portal. Completed requests cannot be edited or canceled.
Creating a Request
Select one of the available requests from the "Choose a Request" panel to begin. In this example, we've selected the "Production" request:
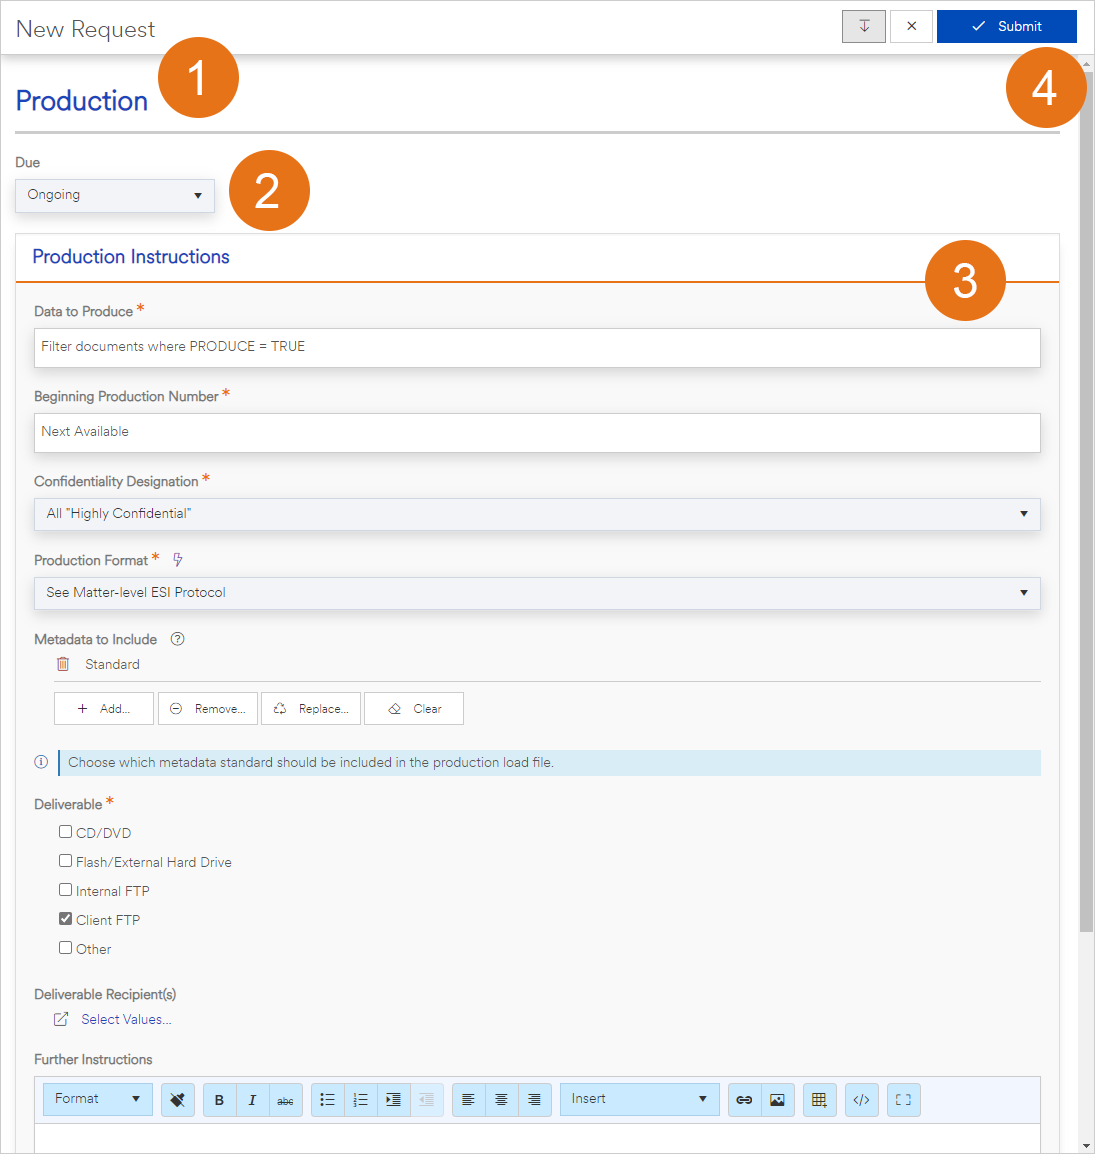
- The name of the request. This is the name of the form, and will be the name of the project and task created within the main site.
- The expected due date to have the request completed by. The date cannot be in the past. If the workspace settings has been defined to require project and task due dates, this field will also be required on the portal. An ongoing request is simply a request that does not have a specific due date.
- Form sections and fields. These are the sections and fields as defined by the selected request form. The portal maintains the same functionality as the main site, so any normal fields (including required or not required fields), reference fields, field properties, and conditional properties are present.
- Submit and Cancel buttons. The submit button creates the request and the Cancel button ("X") cancels the dialog window. The button with the down arrow assist with resizing the dialog window in the event it did not fit the contents to size automatically.
When a request is submitted, Agility Blue will internally create both a project and task as a draft project:
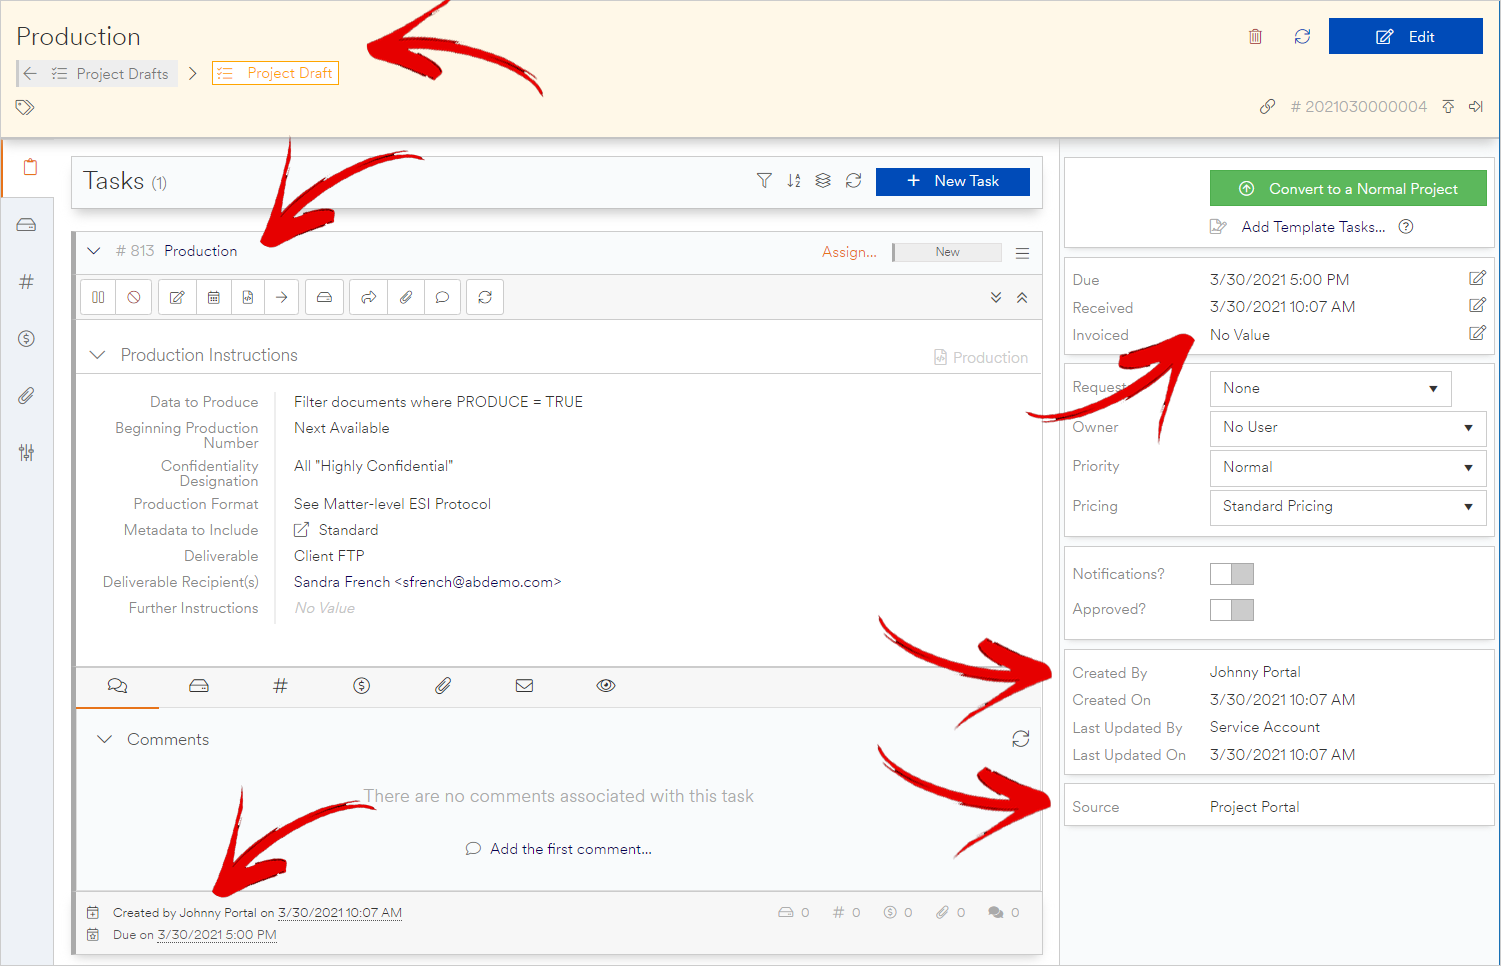
You will notice in the main site as in the image above, the name of the project and task is the name of the request; the due dates for the project and task is the request due date; the project and task created by information is the portal user that created the request; and the source field for the project notes that it came from the project portal.
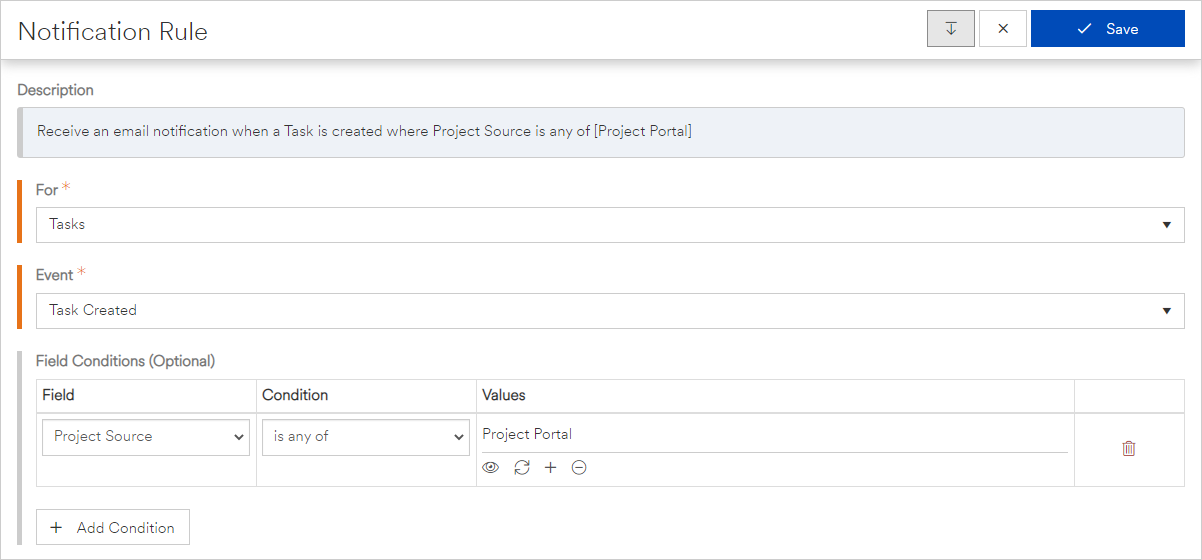
If you'd like to receive notifications whenever a task is submitted from the portal, add a notification rule that has the description:
"Receive an email notification when a Task is created where Project Source is any of [Project Portal]"
The request portal will show the request with information about the request id (task Id in the main site), the current status, the request name (project and task name in the main site), the matter it is assigned to (if any), when it is due, and the initials of the person assigned to the request.

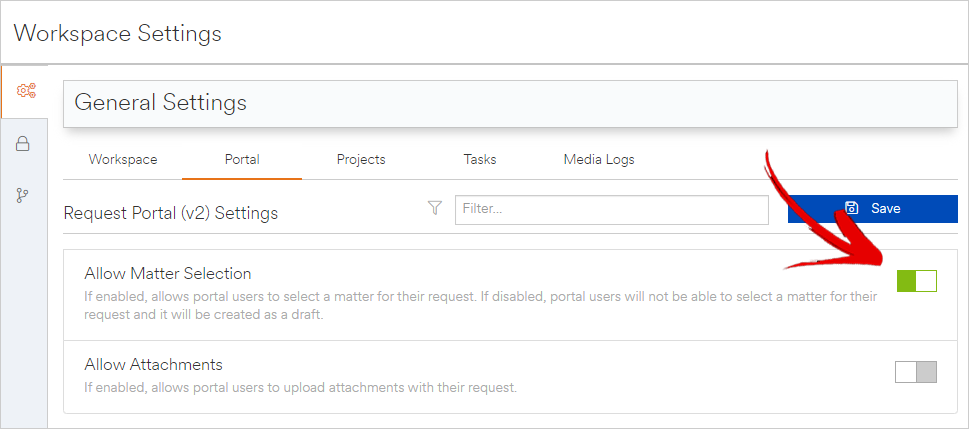
By default, the request portal prohibits users from being able to select a matter, and as a result, the request is internally created as a project draft - similar to emailing into Agility Blue, but with the benefit of allowing users to fill out succint information via forms. This is a protection for environments that don't want their portal users to be able to see all of the matters the workspace has. If you do want the user to select a matter when submitting a portal request, and don't mind that they can see the names of all the matters in the workspace, you can enable the "Allow Matter Selection" workspace setting within the main site:
Viewing a Request
Click on a request's name to view the request:
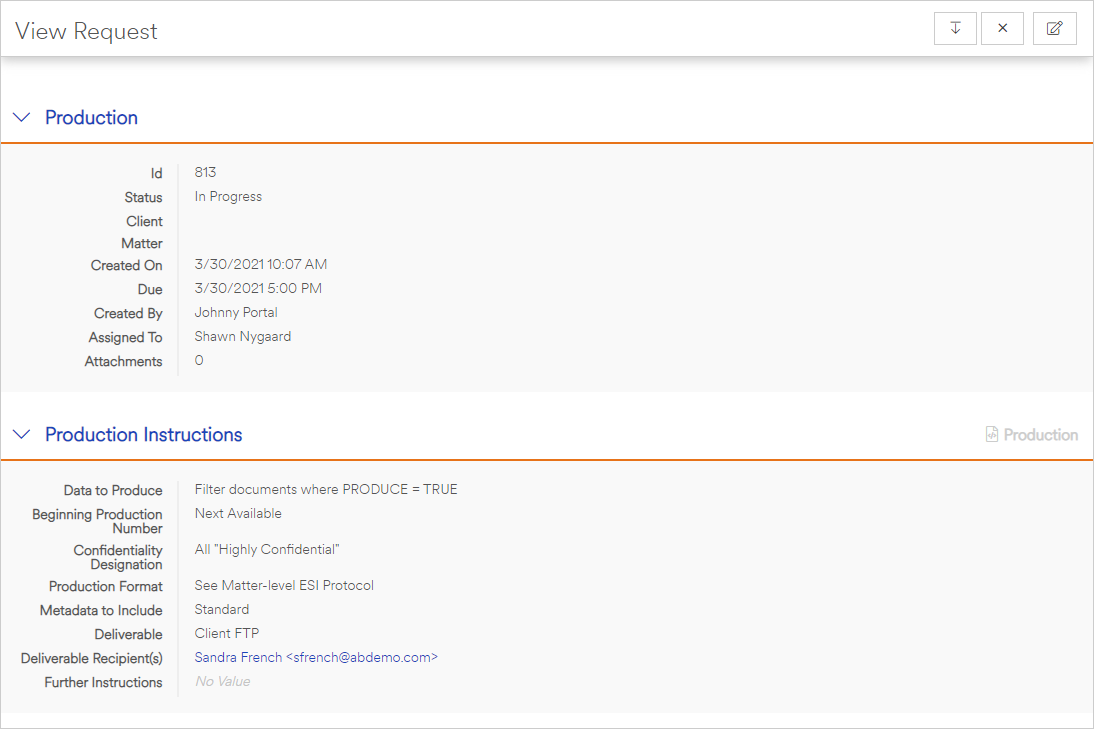
If the request is open and hasn't been canceled or completed, you will see an edit button at the top right that allows you to edit the request.
Cancel an Open Request
If you wish to cancel an open request, you can click on the context menu on the far left of each request (the icon with the 3 stacked bars) and choose the "Cancel" option.

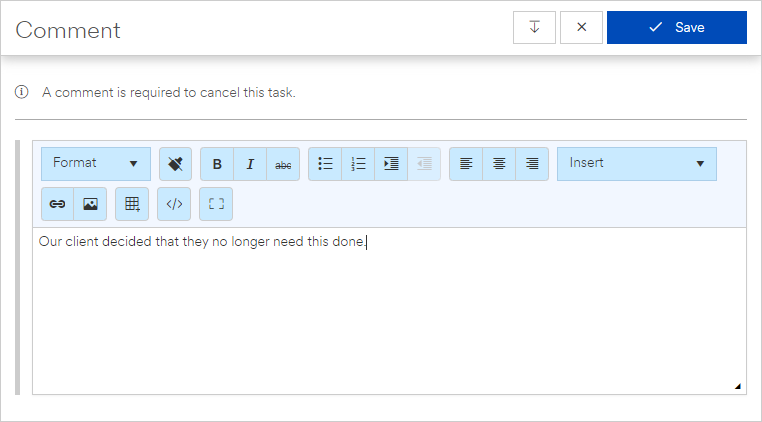
A comment is required to cancel a request. Enter a comment in the next dialog window and hit save.
